I’ve been running my blog for over 5 years and having great photos is key to a successful blog. I take all of my photos with my Nikon D5300 DSLR camera with no flash which can make the photos seem a bit dark. The best way to brighten my dark photos is by using Picmonkey, which is an online photo editing site.

To get fantastic photos you don’t have to have expensive software such as Photoshop elements to get brighter photos, cropped images, collages, text overlays and more. I’ve been using Picmonkey for over a year now and it’s my go to photo editing site, best of all they have a free version. The free version of picmonkey allows you to do most of the photo editing and if you want the fancier fonts you can pay $33.00 for a year of full access, which is what I do. Best $33 I spend all year long.
Now let’s talk photos. See how my photo looks dark on the left hand side and so bright on the right hand side? I was able to achieve these brightening results by the click of a simple button in Picmonkey. These tips are going to make your life so much easier, I promise you.
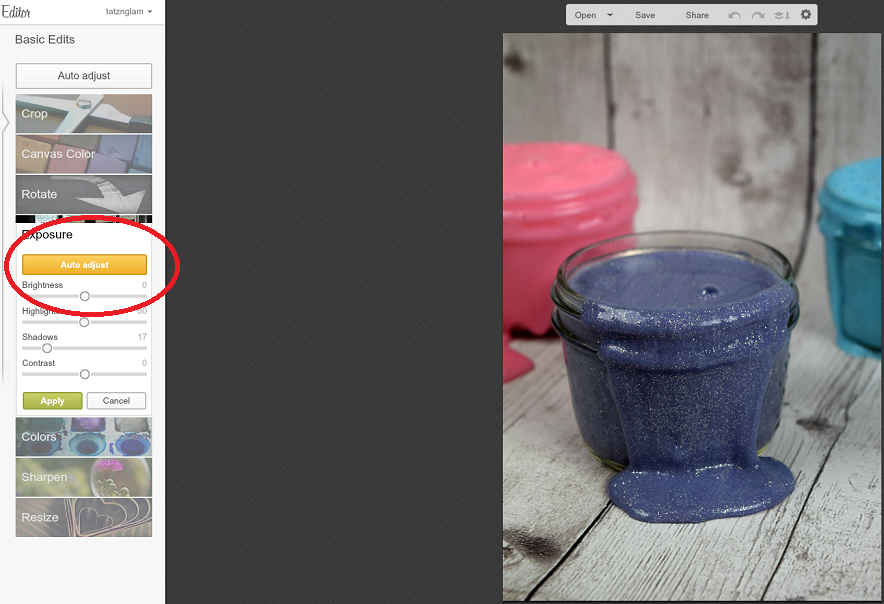
Head over to Picmonkey.com and upload your image that needs editing. I uploaded a copy of my newest DIY project for Glittered Slime and this is the photo I’m going to edit for this tutorial. Click exposure and auto adjust and see how bright and crisp it makes your photos. If you’re happy with the results just click apply. If you’d like to brighten your photos a bit more use the bars and play with the highlight, shadow and contrast for your achieved results. Once you are happy just save your file. How easy was that?