
With all the Holidays coming up it’s always a great idea to have DIY Favor Treat Bags ready for any occasion. I found the cutest file on the Cricut design store and today I want to share with you how you can make your own homemade favor treat bags.
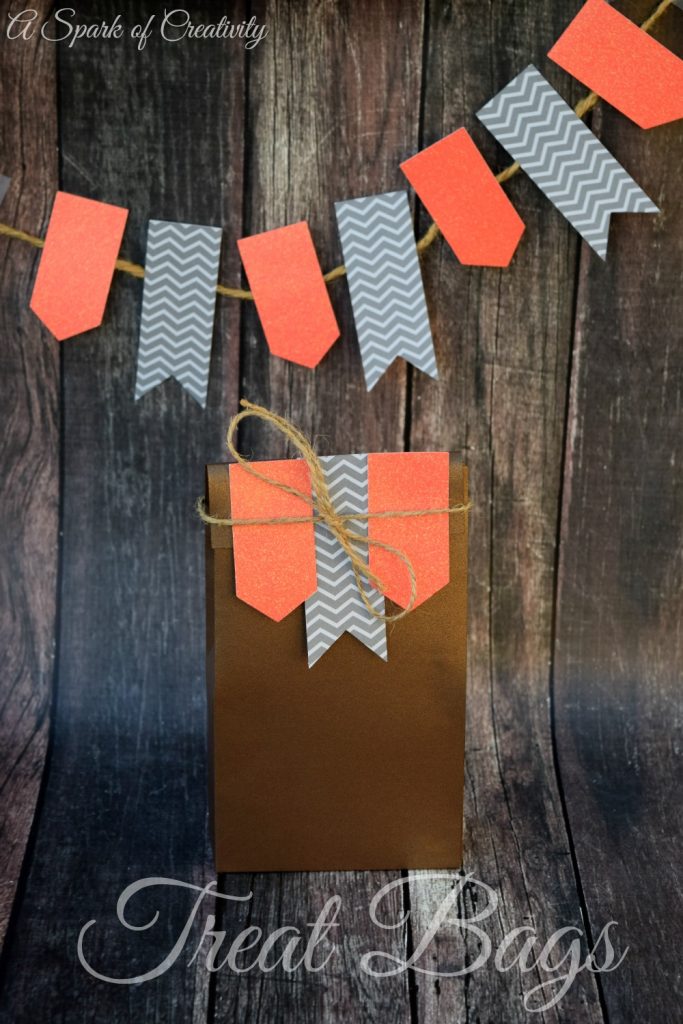
Whether it’s Christmas, New Years, Valentine’s Day, Easter, St. Patrick’s Day, Fourth of July and all other Holidays there’s always an opportunity to fill a bag up with some sweet treats for your loved ones. Since I have 3 little ones in my home, I always try to give them the cutest goody bags that don’t cost a fortune and these Cricut Favor Treat bags are the perfect solution. They’re so easy to create and best of all you can customize with any color scheme imaginable. Aside from Holidays these favor bags would be perfect for Birthday Parties as well! Fill them up with candy, cards, toys, art supplies and anything else you can imagine. Now lets get started…
DIY Favor Treat Bags Tutorial
Supplies needed:
- DCWV Brown Cardstock
- DCWV Glittered Cardstock (I used the glittered stack)
- Patterned Paper
- Scotch Quick Dry Adhesive Glue
- Twine
- Cricut Cutting Machine
- Cricut Scoring Stylus
Directions:
Head over to the Cricut Design Space and open up the file Fall Treat bags and click customize. By customizing this file it allows you to pick and choose what you want to use, change the size of the bags and more. I didn’t use all the included pieces for these treat bags so I really love the customization option. I wanted my treat bags to look uniform so I decided to do two of the same flags and 1 pendant. Since I wanted to change a few things I had to delete the longer arrow so it wouldn’t cut with the rest of my design. I also removed the background shading around the flags because I didn’t want this extra piece in my final favor bags.
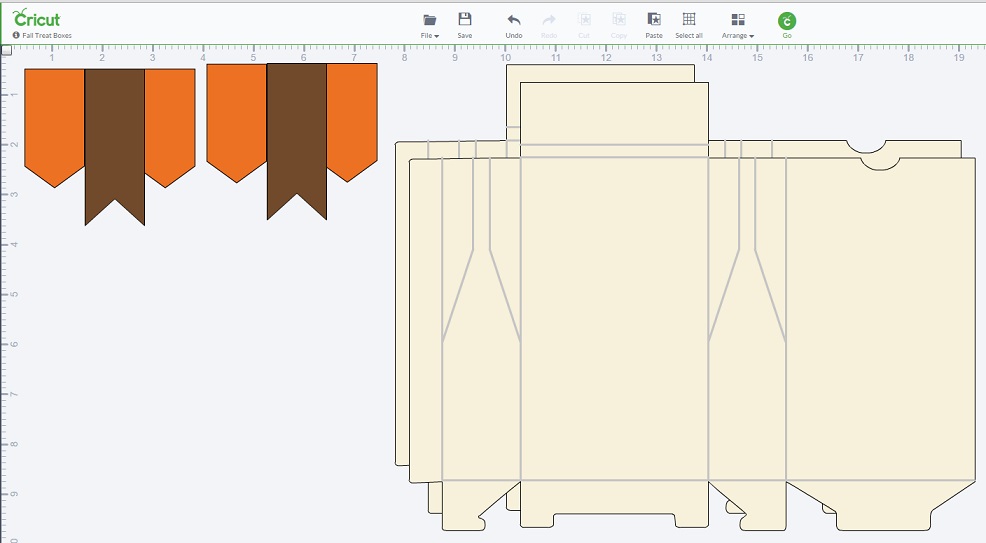
To remove items from your screen just simply click on them and right click and select delete. To duplicate an item just click on it, select copy and click paste. Once you’re happy with your selection it’s time to head over to the cut settings. This can easily be achieved by clicking the green C go button which will guide you through the prompts of your cuts. Each box is a cut and the flags will be paired by style on the same paper. This particular project took a total of 2 pieces of paper for the bags and 2 pieces of paper for the flags/pendants. To cut your material be sure to turn the Cricut dial to cardstock and press the flashing C button on your machine. I love how easy this machine is to use and I especially love how quiet it is compared to other cutting machines. Once the cuts are complete remove your pieces from the mat and it’s time to start assembly. I assembled the bag first by folding all of the scoring fold lines to form the shape of the bag. Once that’s complete I started adding my quick dry adhesive glue and attached it all together. Fold over the top and glue on your flags and pendants and tie up with a pretty piece or twine or baker’s twine! These bags are so versatile and are really perfect for any occasion! I made a set for Halloween, Thankgiving and Christmas now I’m getting ready to make some up for Valentine’s Day. Enjoy.


