
The ideal family night for me is watching a great movie and enjoying some buttered popcorn. To make things a bit more fun I created these DIY Popcorn Buckets and my kids love them! They loved them so much I decided to create a tutorial so you can make them too.
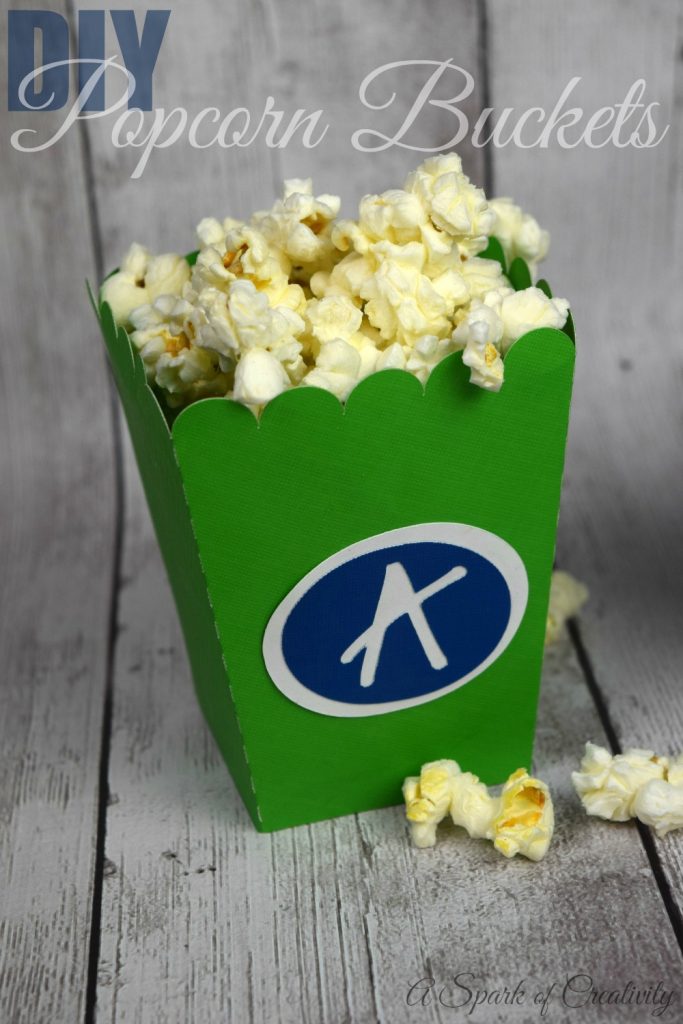
Every Sunday night my family and I have a tradition to have movie night in with some popcorn. The kids lay down on their travel beds and my husband and I stay cozy on the couch, we always watch a fun family cartoon for the entire family to enjoy and popcorn is always a must. Since this is a weekly tradition I thought it would be fun to customize popcorn boxes for my boys, my husband and myself using my Silhouette machine. I was able to fully customize the size of the buckets, the color choices as well as the font choices for the initials. This was such a fun and easy project and my boys had a blast helping me assemble them all.
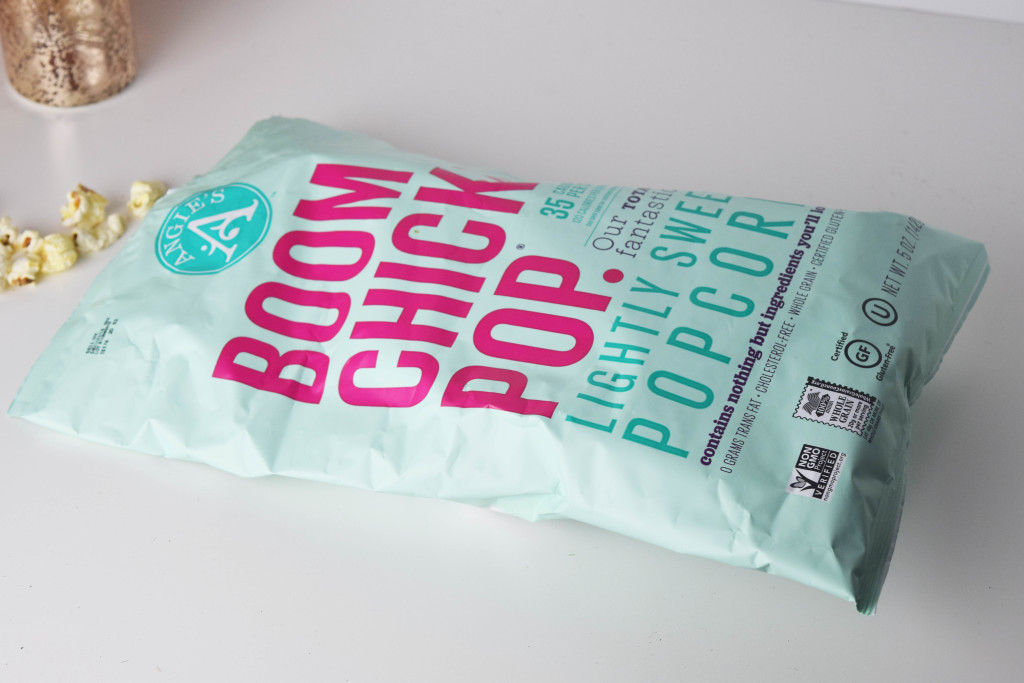
BOOMCHICKAPOP is our new favorite snack in the house and it’s loved by my entire family including the kids. It’s as much fun to eat as it is to say, and that’s exactly how we like it! This popcorn is certified gluten-free and uses non-GMO ingredients. Simple ingredients that make it delicious for your family to enjoy. We use BOOMCHICKAPOP for family night, date night and kid’s lunches as it’s the most perfect snack.
Love giveaways? Enter to win the chance at 3 great Halloween kits that include fun treats and prizes, a $50 Target gift card and a free BOOMCHICKAPOP! #BringTheBoom for a chance to win. Entering is easy and can be done on facebook, twitter, instagram and pinterest!
Ready to make some easy DIY Popcorn Buckets? Check out the tutorial below.
DIY Popcorn Buckets Tutorial
Supplies Needed:
- Silhouette Cutting Machine
- DCWV 12 x 12 Cardstock stacks
- Scotch Quick Dry Adhesive Glue
- BOOMCHICKAPOP Popcorn
Instructions:
I first started off by purchasing the Popcorn file for just $0.99 on the Silhouette online store. Once I purchased the download I went to my Silhouette Studio Designer Software and opened up the file from my library and sized it to fit the entire 12 x 12 cutting surface. This file included colored stripes but I opted to keep mine solid since they’d be handled by kids most of the time to me less is more. I right clicked on my image and selected “release compound path” than I right clicked again and selected “ungroup”. By ungrouping this allows me to delete parts of the file I no longer wish to use so I decided to delete the stripes since I wasn’t going to be using those. Once I was happy with the sizing of the boxes I headed over to my cut settings and selected cardstock as my material and turned my blade to a 3. Next I applied my cardstock to my cutting mat mat and fed it into my machine and clicked sent to silhouette. The machine is pretty amazing and cuts the boxes as well as adding perforated marks for easy folding. Once the cuts were complete I folded on the perforated lines and started gluing the edges together using my glue. I allowed them to dry for a bit and than added the initials on the front of the boxes so my boys know exactly which boxes were theirs. I really hope you enjoyed this tutorial.


