• Home
  • New Here?
  • About
  • Contact
  • Advertise Here
  • Disclaimer
    • Privacy Policy

A Spark of Creativity

From my Home to yours! Living-Loving-Creating

  • DIY Crafts
    • Organization
  • House Tour
  • Recipes
    • Beverages
    • Appetizers
    • Breakfast
    • Desserts
    • Dinner
    • Kid Friendly
  • Resources
  • Reviews
    • Product Reviews
      • Baby Product Reviews
      • Beauty Reviews
      • Household Product Reviews
      • Kids Product Reviews
      • Vehicle Reviews
        • KIA Vehicle Reviews
        • Mazda Vehicle Review

Glittered Pine Cones Center Piece

December 8, 2014 by Brittany 2 Comments

Glittered Pinecones 2

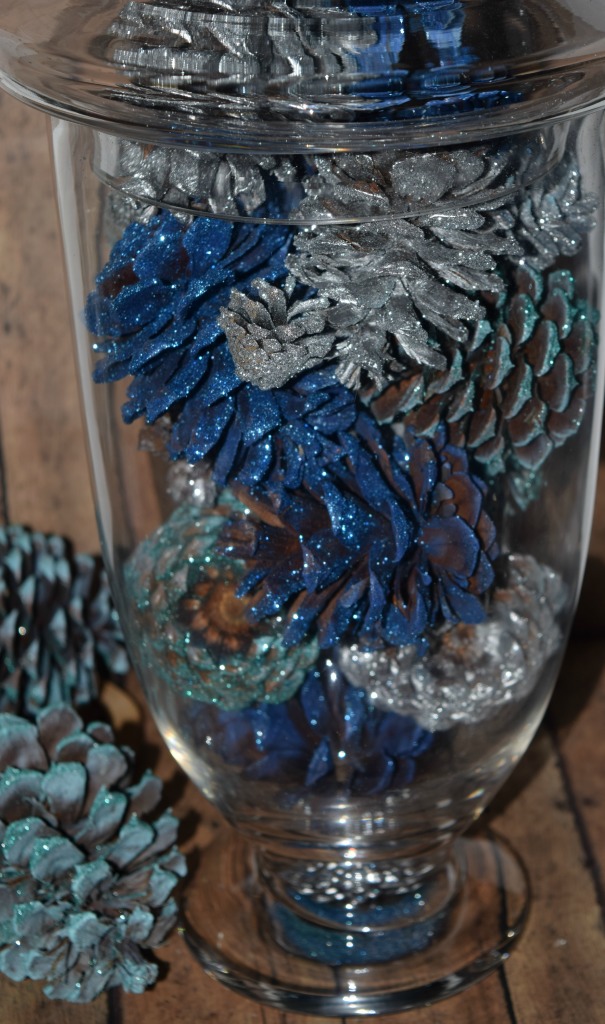
It’s finally getting cold in Southern California so I’m getting into the Christmas spirit and decorating my home with lots of DIY Projects on a budget. There are so many ways you can upcycle things lying around the home or pick up supplies for super cheap at your local craft store. I am a girl who LOVES glitter, and I feel glitter makes things so much more prettier in the home so this weekend I ventured out to make some glittered pine cones for a beautiful home decor piece. This project was so easy to do and really fun plus I loved that my boys could help out to in the fun. Please note this project was fun but very messy, my fingers were covered in spray paint, glue and glitter for the rest of the day!

Supplies Used

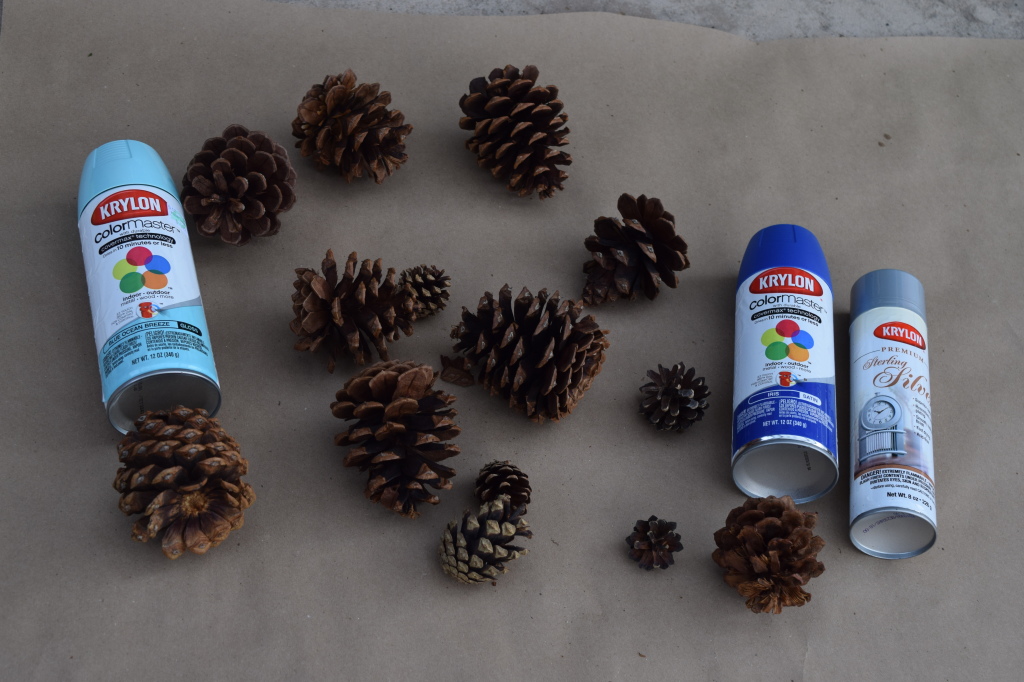
  • Royal Blue Spray Paint
  • Silver Spray Paint
  • Ocean Breeze Spray Paint
  • Elmer’s Spray Adhesive Glue
  • Silver Glitter
  • Royal Blue Glitter
  • Light Blue Glitter
  • Pinecones (Purchased a bag at Michaels)
  • Large Apothecary Jar (Purchased at Michaels)

Tutorial

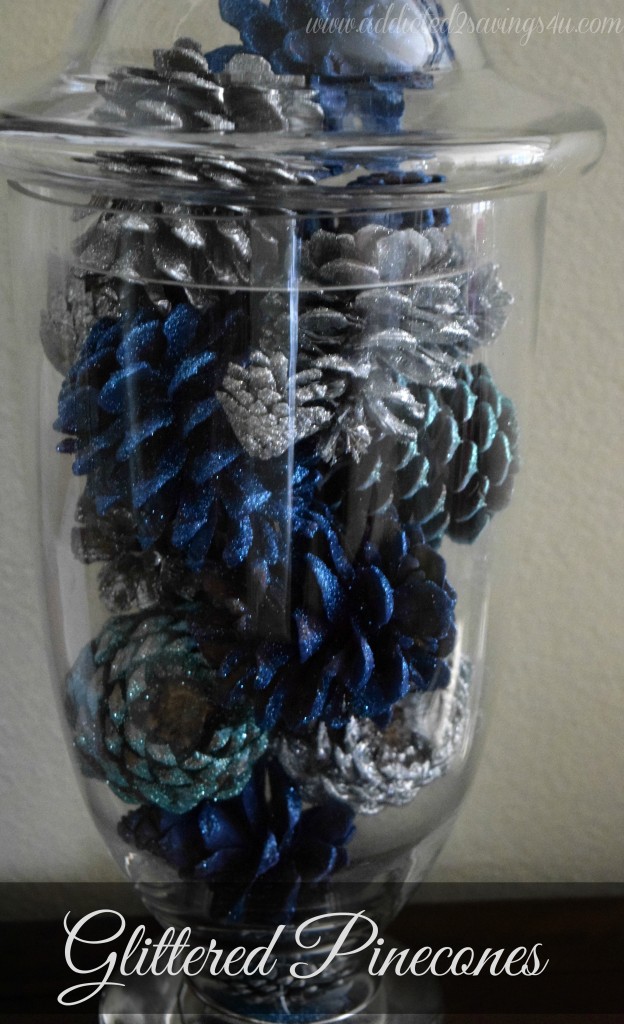
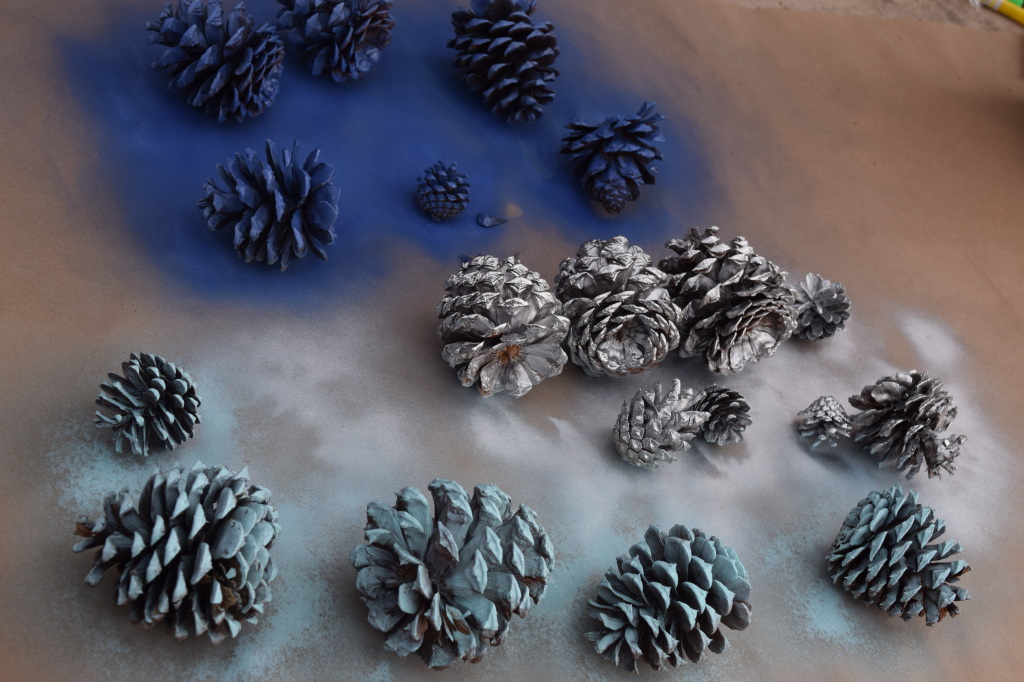
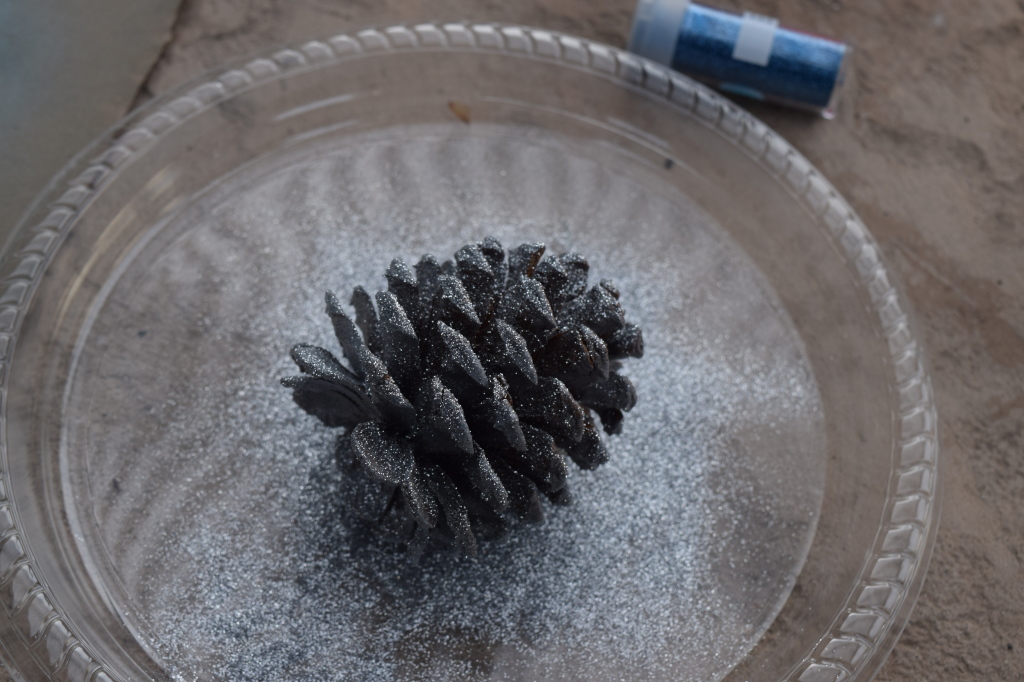
I headed to my local Michaels and purchased all of my supplies and headed home for an hour of fun. I laid out a piece of brown paper so I could do my Spray Painting outdoors and not ruin my concrete flooring. I laid out 3 rows of Pinecones and started spray painting the royal blue ones first, followed by the silver and finished up with the ocean breeze pinecones. I spray painted one side and than rotated a few minutes later and spray painted the next side. After I allowed them to dry for about 10 minutes i spray them with spray adhesive glue laid on a plate one at a time and sprinkled lots and lots of glitter on all over them. Shake off the excess glitter and pour back into the glitter container. Once these were completely dried I placed them in a large Apothecary Jar and placed on my entry table. I love the way these pinecones look and they glisten so much. Such a beautiful DIY Home Decor that’ll I’ll be keeping up year round!

DSC_1044

DSC_1045

DSC_1047

DSC_1051

Glittered Pinecones3

Glittered Pinecones

« Deer Mug for the Holidays
Crockpot Monkey Bread »

Filed Under: DIY Pinterest, Featured, Home Tagged With: Glittered Pine Cones, Pine Cone Center Pieces, Upcycled Pinecones

Trackbacks

  1. Tyrant Unleashed says:
    December 10, 2014 at 4:01 AM

    Tyrant Unleashed

    Glittered Pine Cones Center Piece - Addicted 2 Savings 4 U

    Reply
  2. DIY Glittered Pinecones for Valentine's Day - A Spark of Creativity says:
    January 25, 2015 at 12:53 PM

    […] There is something about glitter that just makes a statement in your home. I love to place glitter on everything but my husband isn’t so keen on the idea so my Glitter home decor projects have been limited. These DIY Glittered Pinecones are perfect laid out on a tray in your entry way or stored in a tall Apothecary jar for a grand focal point in the home. I display these on my entry table so all my guests can see them as seen as they visit my home. These would also look fantastic in the center of a kitchen table, on a fireplace mantle or even on the corner of your desk. This is one of those projects that doesn’t take very much time but I do recommend doing this outside as you are dealing with spray paint, spray adhesive and lots of glitter. Best of all this project allows you to do any color pine cones to coordinate with any upcoming holiday. Check out the gorgeous blues and silvers I did for my Christmas display here. […]

    Reply

Leave a Reply Cancel reply

Your email address will not be published. Required fields are marked *

Connect with Me

  • 
  • 
  • 
  • 
  • 

Email Me

[email protected]
 photo 1517578_632633873444635_1287363888_n_zps774b62c1.png

Shop with us!

 photo 1517578_632633873444635_1287363888_n_zps774b62c1.png

Looking for something?

Like me on Facebook

  • Join Our Team

    Popular Posts

    Rootbeer Float Cupcakes

    Almond Vanilla Body Butter

    Caramel Apple Taquitos

    How to make money with your Camera

    Simple Banana Bread Recipe

    Apple Pie Tacos Dessert Recipe


    Proud Member Of


    Amazon Associates Disclosure

    Brittany Shaw is a participant in the Amazon Services LLC Associates Program, an affiliate advertising program designed to provide a means for sites to earn advertising fees by advertising and linking to Amazon.com.

    Copyright © 2016 · Foodie Pro Theme by Shay Bocks · Built on the Genesis Framework · Powered by WordPress