
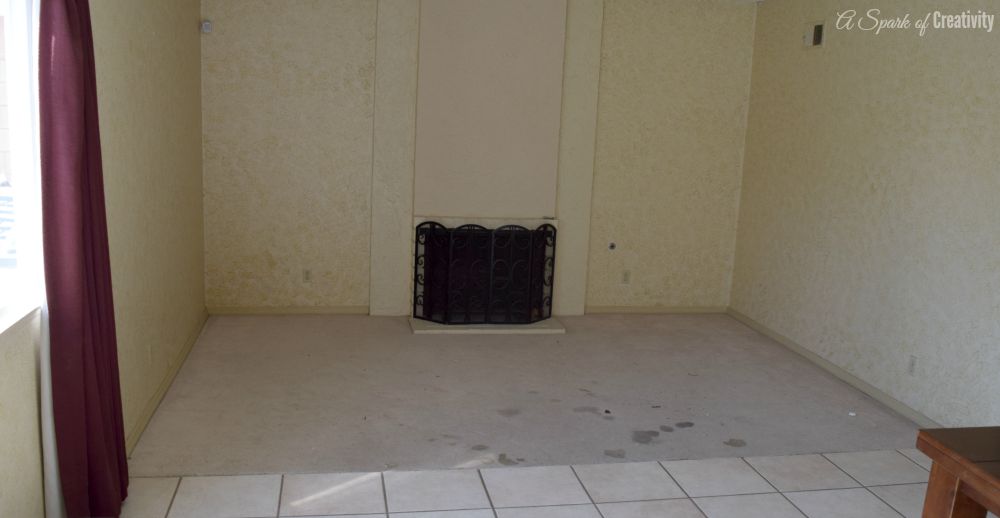
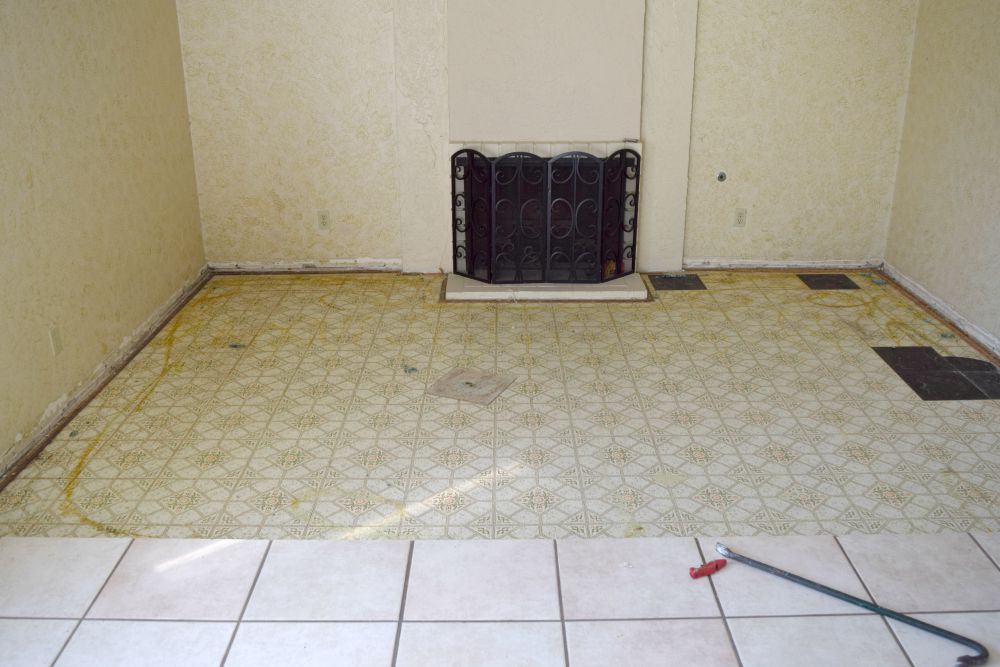
When we moved into our current home, we went into the home knowing it’s a fixer upper. The home had lots of potential, lots of square footage and we fell in love with the pool out back of course! One of the things I’ll never understand is why the homes had this tiny conversation drop down areas in the living room?! If you keep reading I’m going to show you How to Transform an awkward space with concrete.
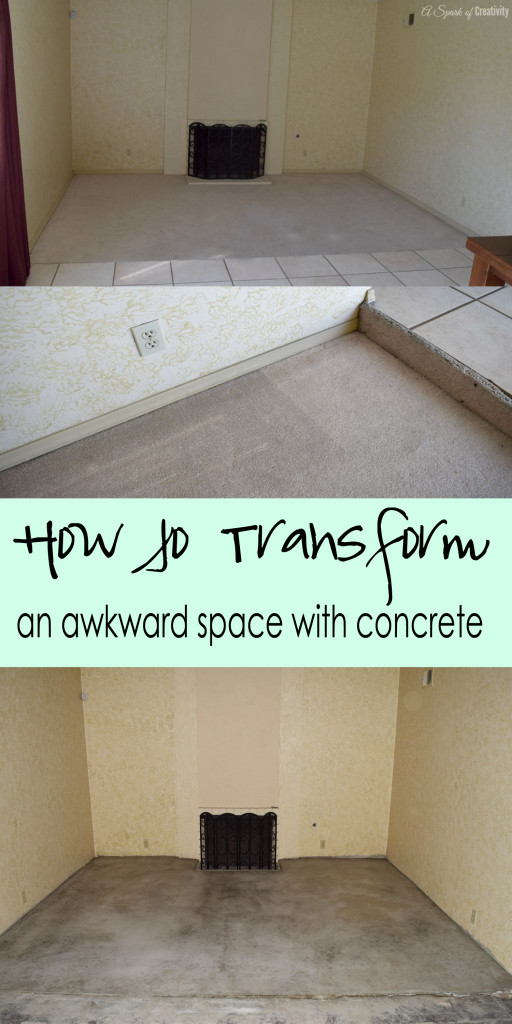
Back in the 1970’s I assume conversation areas were popular but today my husband and I wanted to create a room to have our fires, watch TV as a family and enjoy a large sectional couch. That all wasn’t going to happen with a 6″ step down area. The space was awkward and left no space for even the smallest couch so changes had to be made. With the help of QUIKRETE concrete we were able to transform that awkward space with concrete and now we have one overly large living room that I’m in love with.
I was always intimidated by concrete thinking it’d be hard to mix, pour, and spread out evenly but this DIY project changed my mind very quickly. My husband and I tackled this project together and it only took about 6 hours start to finish and it turned out so perfect!
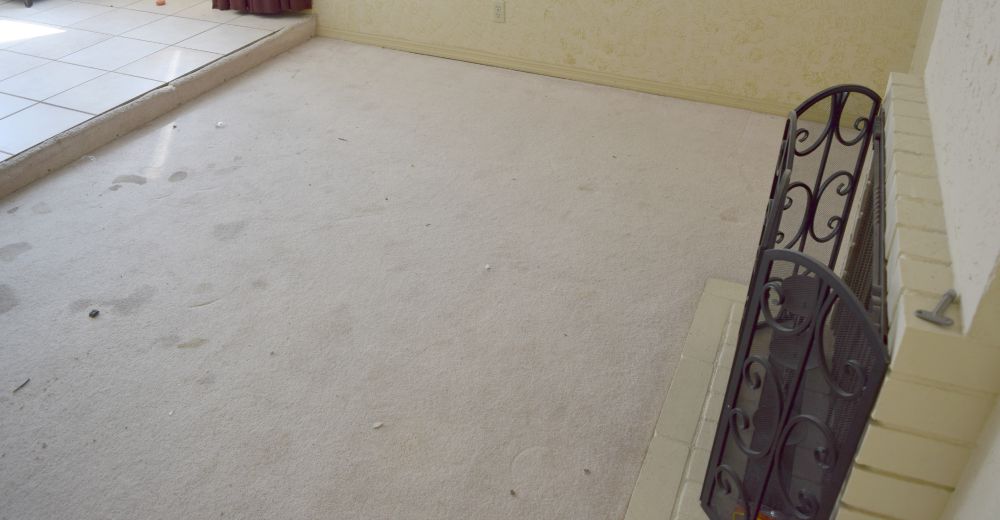
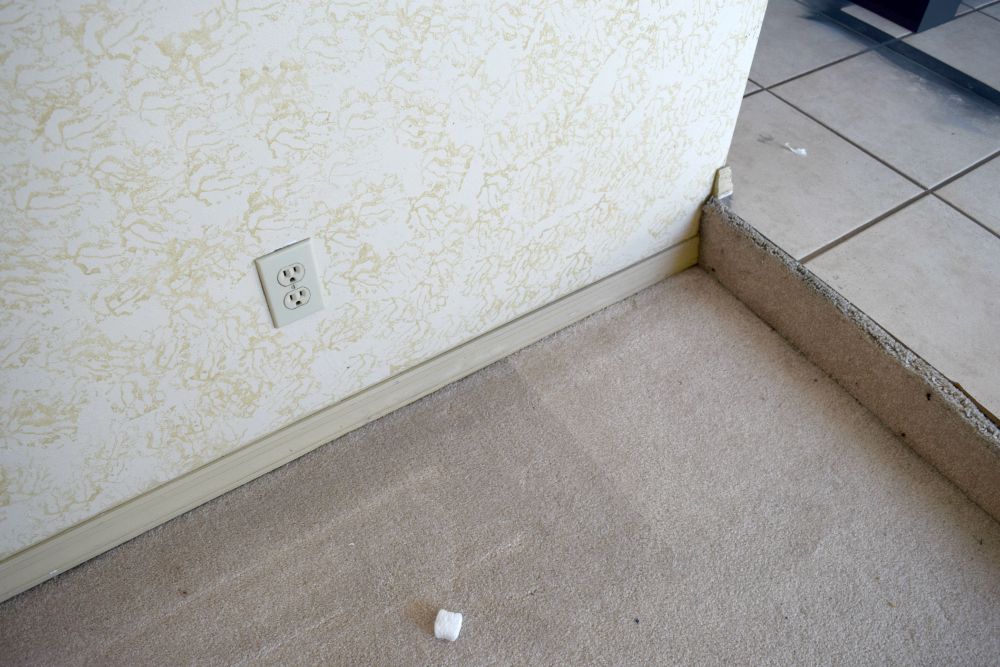
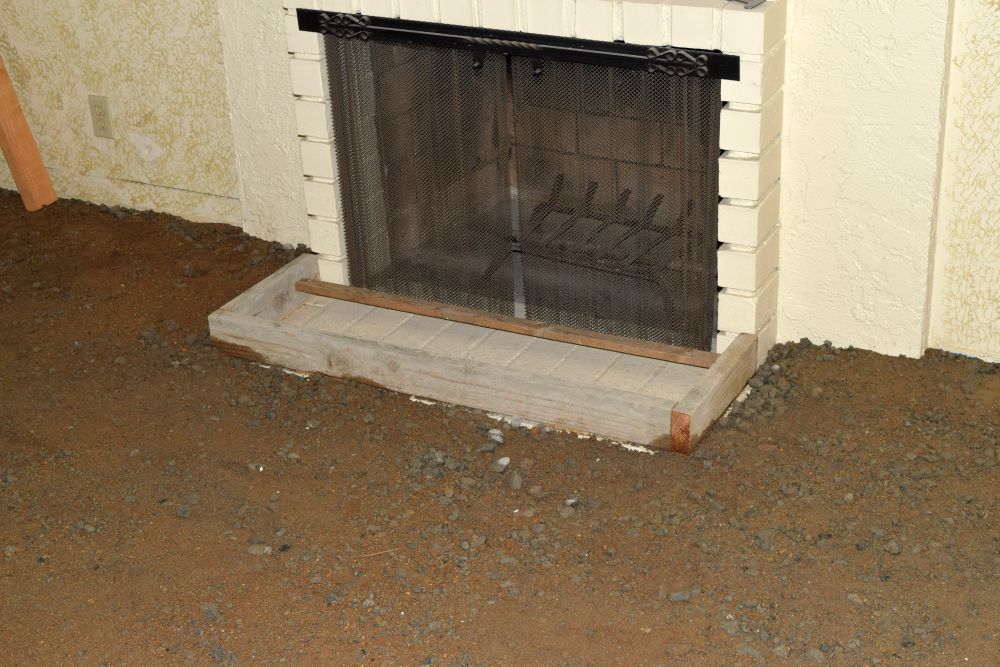
First things first we had to remove all of the old tile surrounding the drop down area. The tile was easily removed using a crow bar and some lady muscles (just kidding, my husband did most this part). Next we remove all the old carpet and padding and tossed out into the dumpster. I’m not a huge fan of carpet anyways so I was glad to see it gone! Once the carpet was gone we used 2 x 4’s to frame out the fireplace. Since we’re raising the drop down a good 6″ we needed to make sure the fireplace wasn’t destroyed and can still be functionable. By framing out the fireplace well still be able to access it and use it as often as we would like to.
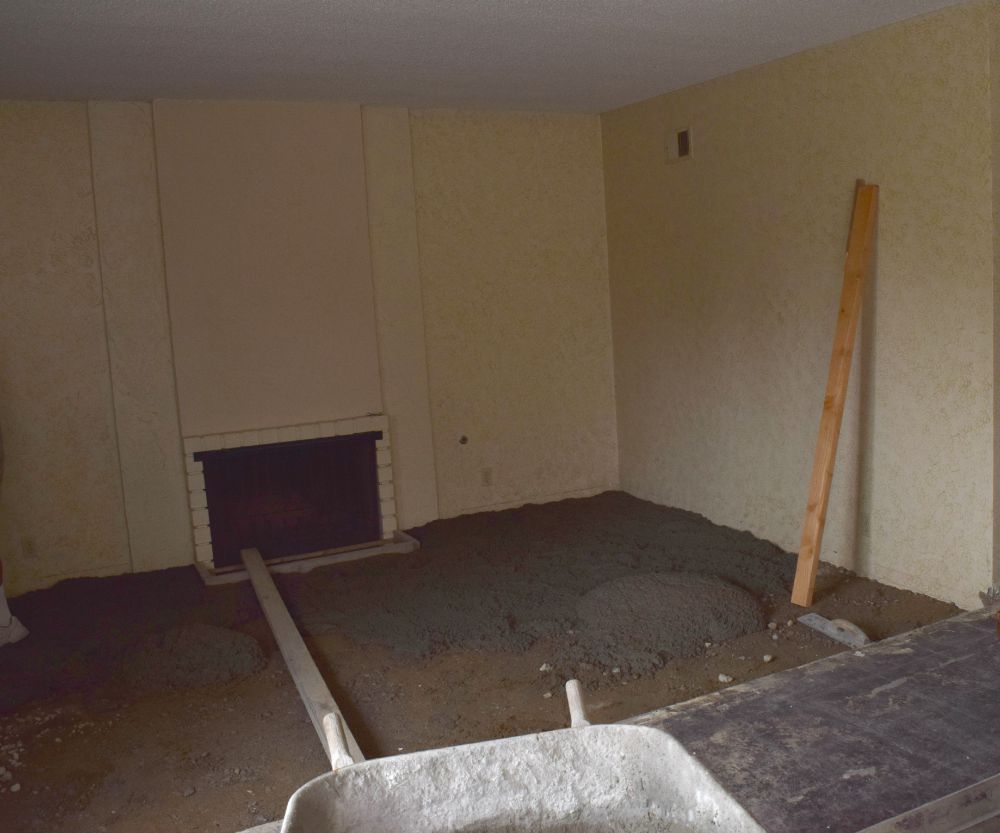
Now it’s time to add a filler. A filler is a great idea if you want to use less concrete product and can easily be done using those old tiles you yanked up or even dirt. We did about 1-2″ worth of filler and leveled it out nice and smooth. Once the filler was smooth it was time to start mixing up our QUIKRETE 5000 Concrete Mix is a commercial grade blend of stone or gravel, sand and cement specially designed for higher early strength. This was the perfect Mix for our awkward space and it was so easy to work with.
To give the proper mixing instructions I got this from the QUIKRETE site:Project Instructions
When working with cement-based products, always wear eye protection and waterproof gloves.
Step 1
Empty the mix into a mortar tub or wheelbarrow and form a depression in the middle of the mix.Step 2
Measure the recommended water amount (each 80-pound bag of concrete mix will require about 3 quarts of water).Step 3
Pour approximately 2/3 of the water into the depression. If using liquid cement color, add to the mixing water.Step 4
Work the mix with a hoe, gradually adding water, until the mix reaches a uniform, workable consistency. Properly mixed concrete should look like thick oatmeal and should hold its shape when it is squeezed in a gloved hand.
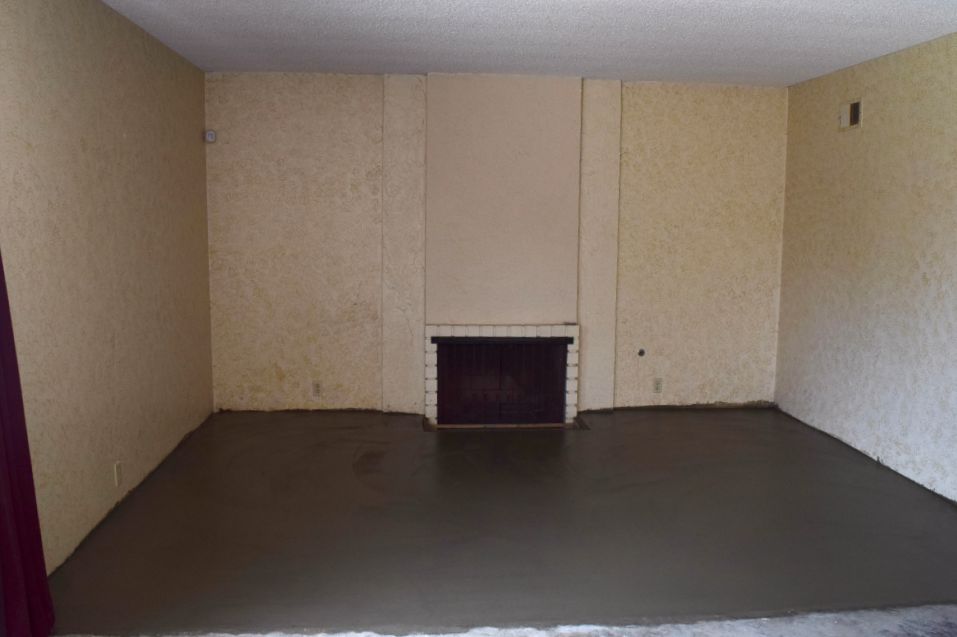
Once the concrete is mixed, using your wheelbarrow carefully roll it into your home and start pouring in the mixture towards the center of the project area. Once you have a sufficient amount you’ll want to start leveling it out using a long 2×4 piece of wood. Be sure to work quickly to get it all smoothed out before it starts to harden. Continue working until the entire area is filled (I recommend wearing water proof boots so you can really get in there and level things out). Once the area is filled make sure it’s completely level with any surrounding floors and allow to dry for at least 48 hours. Since ours was indoors we waited 72 hours just to be sure. You’ll notice during the drying process the concrete goes from light to dark. Once it’s dry feel free to walk on it, dance on it and move your furniture on it.
Right now ours is an empty room because we’re getting ready to install our hardwood floors downstairs so I’ll be sure to come back and update once the new flooring is in. I really hope this post inspired you to pick up some concrete and transform an awkward space in your home. It’s supposed to be your dream home and doing projects yourself is a great way to cut costs.
I was provided material to complete this project from QUIKRETE. All thoughts and opinions are my own.

Oh the fun of home remodeling. I love how level everything looks now. I don’t blame you for not keeping it. I am a clumsy person and would probably trip and fall going up.
I cannot wait to see the transformation! Adding the cement was definitely a great decision - better safety for you little ones and now the room will look like they are all together.
Was that space previously a garage? My grandparents had converted their garage into a second living room, and it was left with that kind of drop, not as deep but still a drop. Good job getting it all level!
Hi Emily thanks for the kind words! It was actually considered a conversation area from the 70’s. So we have a free flowing living room/family room combo and the drop down just didn’t make sense in today’s world.
I love doing DIY projects on my home and concrete is one thing I have been scared to use
Great idea! Can’t wait to see the full transformation!
I can’t WAIT to see the finished room!
That looks really great! Your house isn’t going to recognize itself when you guys are done!