
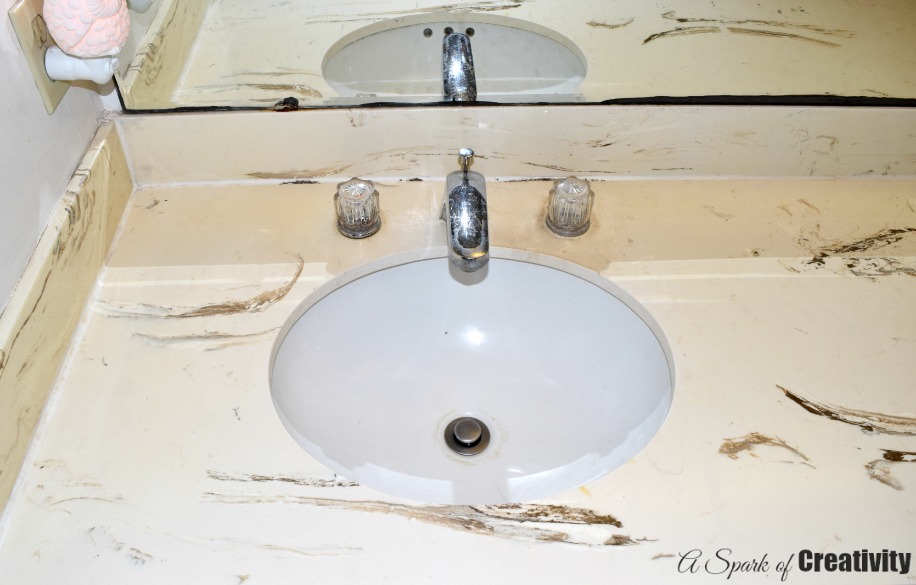
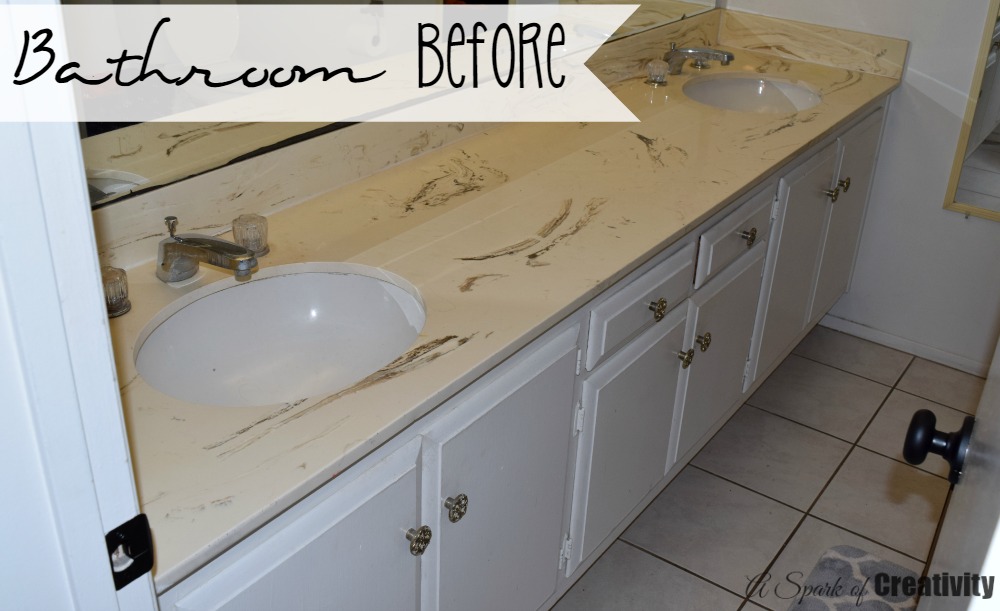
We finally moved into our new home about a week ago and I couldn’t wait to get started on my long list of projects. We have so many projects on that list that we just don’t have all the money upfront to make the home our dream home. I love to think of myself as very creative and I love to take on the challenge of turning something old into something new with the help of just a few supplies. The bathrooms in this home are dated and just not my style so I decided to give them a beautiful makeover using contact paper. A quick and easy project, that doesn’t cost a fortune but makes me feel like I just got a brand new Master Bathroom Marble Vanity without the high end cost. Wondering how I did this? Well just keep on reading and see how easy it really is to transform anything in your home with Contact Paper.

Master Bathroom Marble Vanity Makeover
What you need:
- Marble Marmi Grey Contact Paper
- Razor Blade
- Bathroom Vanity Top
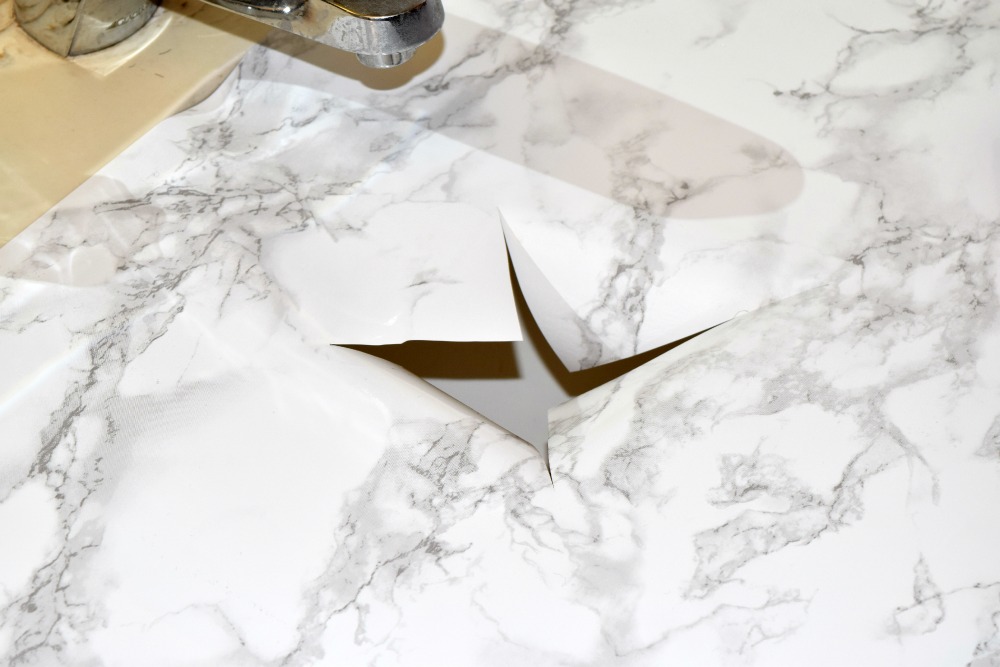
First things first, make sure you clean your vanity top off really well and make sure it’s completely dry before you start applying your contact paper. I wanted to make sure I removed any hair or gunk lingering around that would interfere with my vanity makeover. My Vanity is a bit deep so I had to apply the contact paper in two steps which was fine with me, just a little bit more time involved. I laid out my Marble Contact Paper and measured out the length of my vanity and cut the length with my razor blade. Since my Vanity is so long my husband and I tackled this project together to ensure a smooth finish and little to no bubbles in the paper. We flipped the marble paper pattern up and slowly started peeling the backing away and applying it. I pulled the backing and my husband applied the contact paper to the sink while firmly pressing down to ensure a great contact and no bubbles. We continued to do this until we reached the other side of the vanity. With the sinks we completely covered them with the contact paper and firmly pressed down our edges on the sides of the vanity on the wall. Cut off the excess contact paper with your razor blade and throw away the excess. To expose the sinks we just made an X cut in the middle and carefully cut around the sinks to remove the paper from them. This part was super easy and you could really see the project coming together. We had to add another section of Marble contact paper for the back part which included the faucets and knobs. This part was a bit tricky. Not only did we have to measure out the length of the contact paper but we had to mark where the knobs and faucets were and try out best to cut around and lay the paper down flat. This project was super easy to do but was very time consuming. In the end I’m completely in LOVE with my new Marble Vanity and it looks like it cost a fortune.


Be sure to come back soon and find out how I updated the actually vanity by Spray painting the knobs with my favorite Rustoleum Spray Paint.
Disclosure: I was provided with the Marble Contact Paper for this Bathroom Vanity Makeover. All photos, thoughts and opinions are 100% my own and I truly love this product and can’t wait to use it again!


